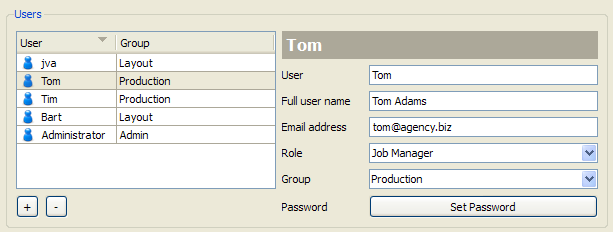
A SwitchClient user connects to Switch through a user name and corresponding password. The user name identifies the SwitchClient user to the server and defines his/her access rights. The system administrator must configure the appropriate SwitchClient user information via the Users pane in Switch.
This topic describes configuring users and user groups. The next topic discusses configuring access rights.
Making changes in the Users pane
All changes in the Users pane are effective immediately. There is no undo capability.
Configuring users

The top portion of the Users pane provides a list of individual users. Sort the users in the table on user name or on group name by clicking the corresponding table headers.
To add a new user, click the + button and enter the user's information in the fields to the right. Providing an email address enables Switch to send notification email messages about a job to the appropriate user (email messages are sent only when this is explicitly designed into a flow).
To delete a user, click the - button. Press Ctrl key to select multiple users and click the - button. A confirmation dialog box appears displaying the message This will remove multiple users. Are you sure?. click OK button to continue with deletion.
Each user is assigned a role by selecting the appropriate item in the "Role" popup list. Options available in this list are: "Administrator", "Job Manager" and "Operator". Users' access to different jobs and SwithClient functionalities are based on the role assigned to them.
Do not forget to set an appropriate password.
Each user is part of exactly one group (but a group can include multiple users). Assign a user to a group by selecting the appropriate item in the "Group" popup list. Since this list contains only already existing groups, a group must be created (as explained below) before a user can be assigned to it.
it is allowed to modify or remove the pre-configured user "Administrator". In fact, at the very least set an appropriate password for that user.
Configuring groups

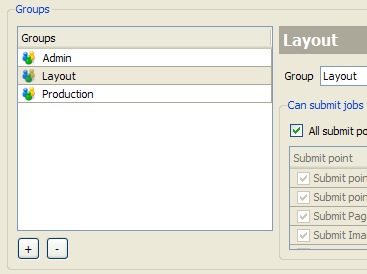
The lower portion of the users view provides a list of groups of users. Access rights are managed at the group level; not at the level of each individual user (that is, a user has the access rights of the group to which the user is assigned).
To add a new group, click the button which has a plus sign(+) on it and enter the group's name in the field to the right. Then configure the access rights for the group (or rather, for users in the group) as explained below.
It is allowed to modify or remove the pre-configured group "Admin".