Quick links
- New Enfocus ID
- Create and edit Action Lists in PitStop Server
- New action to 'Add Bleed'
- Customizable Preflight Messages
- Customizable Action List Messages
- 'Restrictions within Preflight'
- PitStop Server CLI
- Log selection
- New Actions / Action Lists
- System requirements
- Bug fixes covered in this release
New EnfocusID
With previous versions of PitStop, you required an ‘Activation account’ to be able to license your PitStop application. With PitStop 13 we have changed this and we have a new type of account.
We now introduce the EnfocusID. This account is required to activate your PitStop 13 application. The EnfocusID will eventually become a login for a full customer portal where you can access all things relating to your Enfocus software. You can create your EnfocusID and find more information on the following link: https://my.enfocus.com/en/what-is-an-enfocus-id
Create and edit Action Lists in PitStop Server
Within PitStop Server 13 it is now possible to create and edit Action Lists directly within the software. This is a huge improvement over the previous versions as it was necessary to export files to PitStop Pro and then re-import them back into PitStop Server.
This will also make the creation of Action Lists that depend on job ticket based variables much easier.
All Actions and Action Lists are supported, but it should be noted that it is not possible to ‘grab’ elements from within a PDF as you can with PitStop Pro, simply because PitStop Server does not have an interface in which to open a PDF file.
New Action to ‘Add Bleed’
Missing or not enough bleed is a very common problem faced by anyone trying to print a PDF file. Previous versions of PitStop were able to extend rectangular vector based objects in order to create bleed, but did not touch any other page content.
With PitStop 13 we have a completely new approach, and one that works on all page content except text.
This feature requires the PDF to have a Trim Box and a Bleed Box of the correct size for the required amount of bleed.
The Action works in two ways.
- Firstly, if the page has hidden or masked content that can be used to make sufficient bleed then this is used. Such content can be hidden if the creator does not specify bleed when making the PDF, but it is there and can be viewed in the ‘wireframe’ mode within PitStop.
- Secondly, if the required bleed cannot be created using the first method then a ‘mirror’ approach is used to create bleed. Within the Action the user can set a value for where the mirroring happens. This value is relative to the position of the Trim Box.
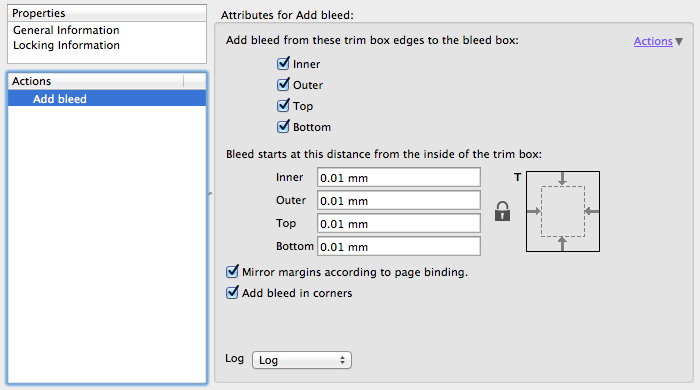
You can see from the above screenshot that the Action has options for adding bleed to the different page edges and corners. There is also an option for working as single pages or with inners and outers for multi-page documents.
The mirrored objects that are generated to add bleed are copies of the original object that is being mirrored. In the case of images these are cached so they only occur once in the PDF file to minimize file size.
This approach also means that any attributes of the original such as overprint settings or ICC tags are retained and copied.
It should also be noted that the objects that are generated to create bleed are still fully editable after being generated in case additional manual work is required.
‘Add Bleed’ supports all color spaces within a PDF file including Spot Colors.
A default Action List for this feature has been added to PitStop 13. See below for details.
Customizable Preflight messages
This new functionality enables you to write your own preflight warnings and messages.
Customers have been asking for this ability for some time so we are delighted to be able to deliver it. Preflight messages are often seen as too technical, especially when the report is sent to customers, so now you can write the reports using your own words, terminology or even language.

Above you can see how to access the functionality. When you add a check to the Preflight Profile you will see on the right hand side an icon of a small pencil. If you click it you will see the ‘Customize Report Message’ interface.
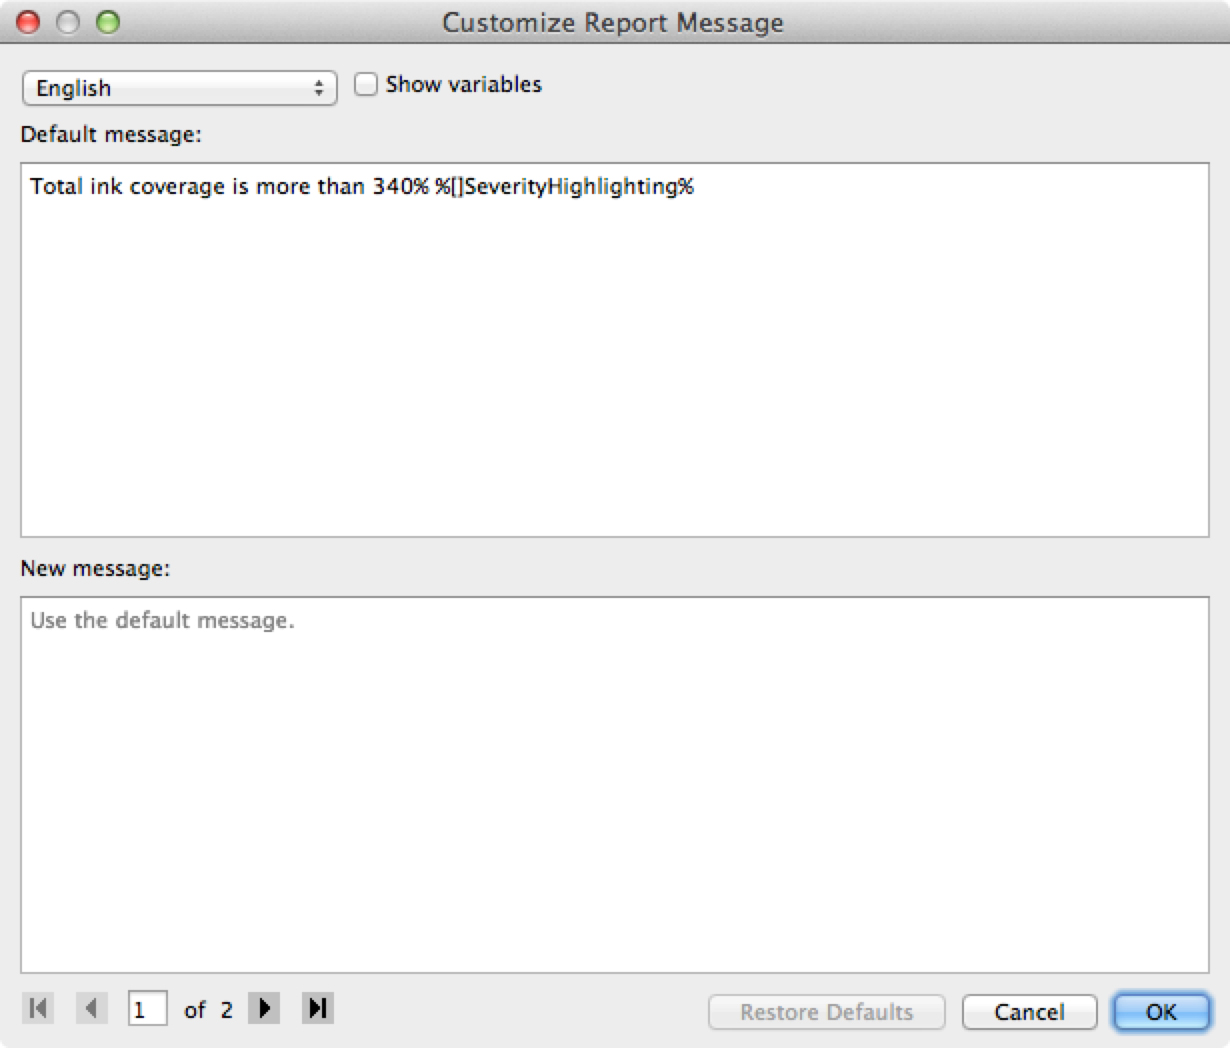
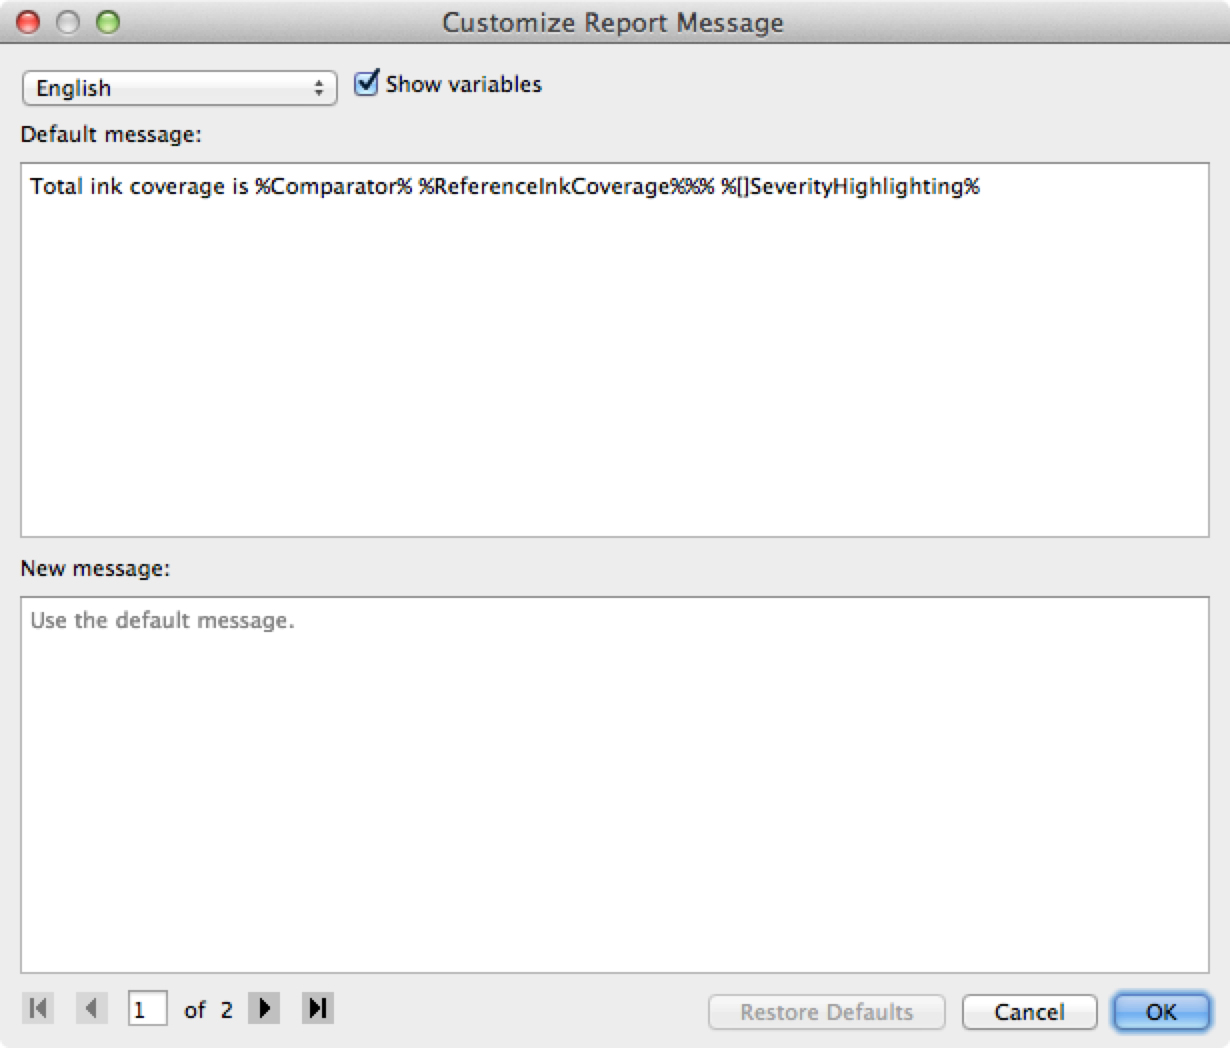
A few things to point out immediately are the fact that you have access to all the languages that are installed, so you can write different messages for each language if you wish.
Also note that at the bottom you will see (1 of 2) that many Preflight checks have multiple messages. The number of these depends on the check, the configuration of the check and also if you have enabled a ‘fix’ for the check. All the messages can be changed if you wish.
You will also notice at the top of the panel an option ‘Show variables’. You can see the function with this checkbox on and off to illustrate the differences. This option shows you how the default message in PitStop is generated. Everything in the panel on the right between the % signs is variable information that PitStop uses to create the message.
You have the choice if you want to base your new message on this information or not.
If you do then simple enable the option ‘Show variables’ and cut and paste the original message into the ‘New message’ panel and then add to, or edit the text as you wish.
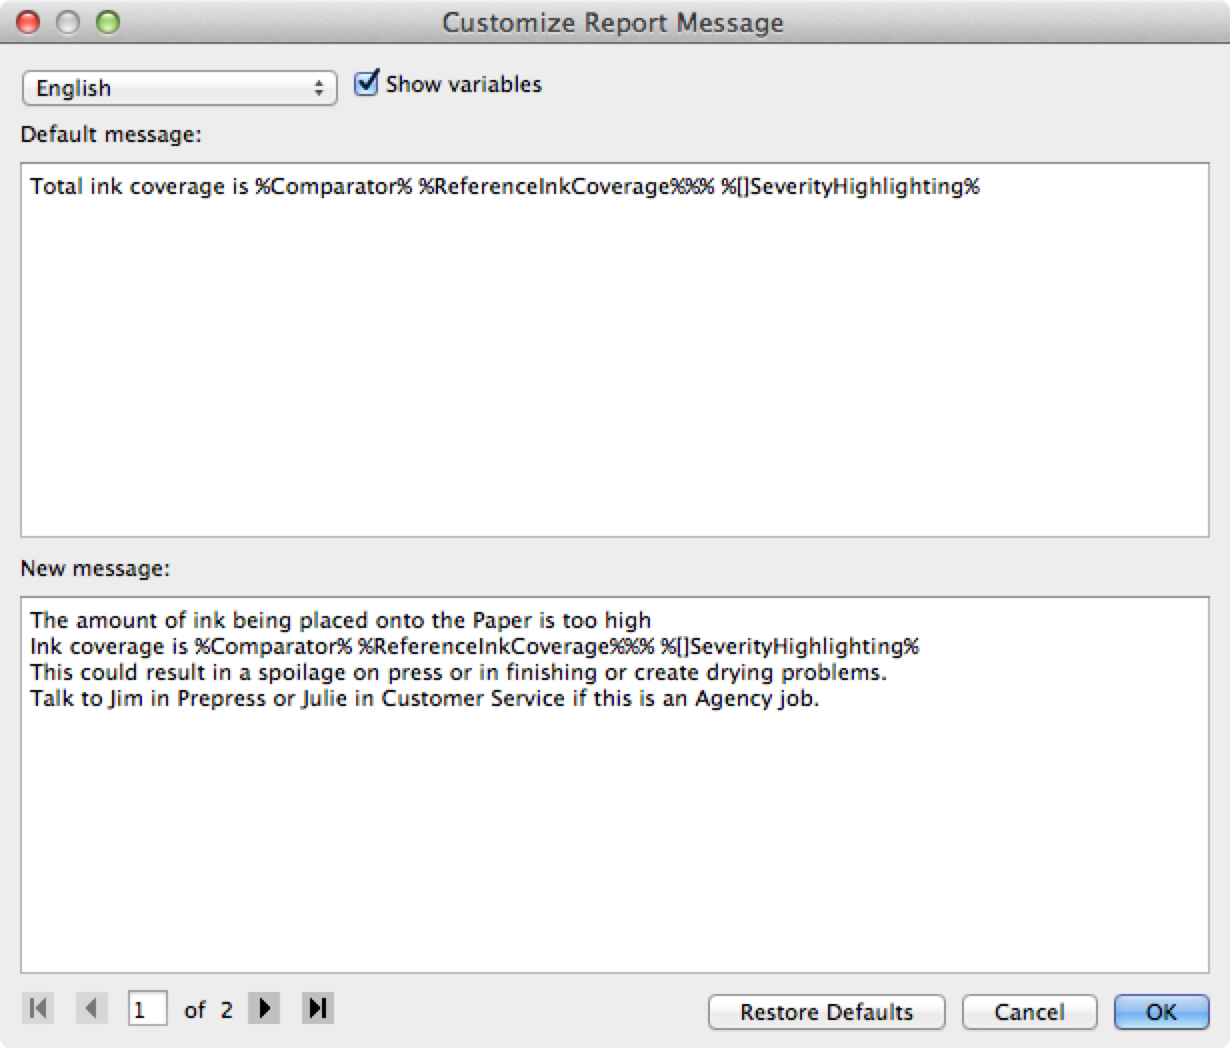
Once you have ‘ok’d’ your customized message it is clearly shown in the Preflight Profile editor that the check has a custom message. The Pencil Icon now has a green tick.
Customizable Action List messages
A similar functionality is available for the Action List messages, but this is accessed with the ‘Actions’ menu.
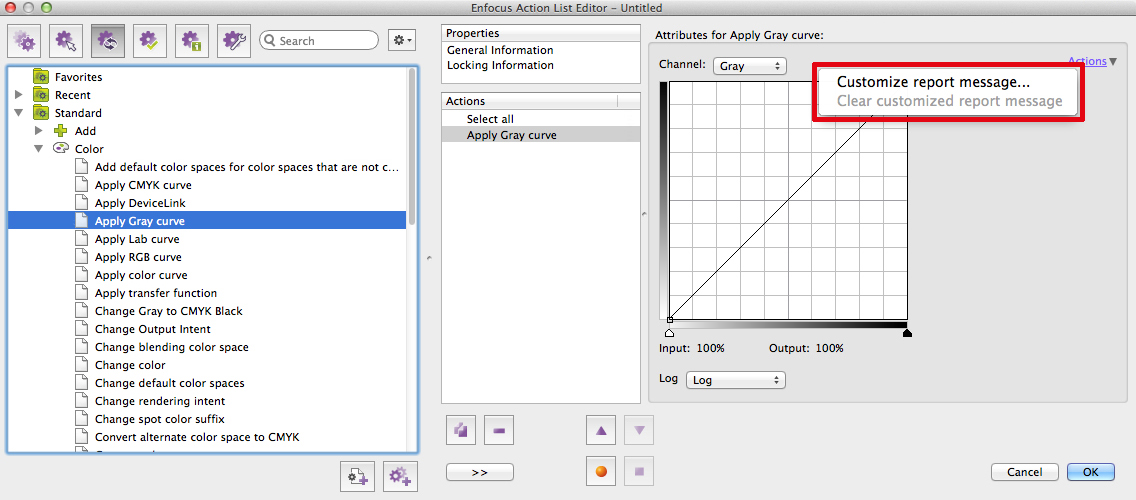

Once the panel is open you see exactly the same window that you do within the Preflight Profile and can customize the messages in the same way. Note that the feature shown has a variable by default; the ‘show variables’ option is only shown when needed.
‘Restrictions’ within Preflight
Within PitStop 13 we introduce a big addition to the way that Preflight is carried out in PitStop Pro and Server. We say ‘addition’ rather than ‘change’ as this new functionality is optional, so you only have to enable it if you want to use it.
The first thing you will notice is that the user interface of the Preflight Profile editor has been improved, all the categories and checks are now on the left hand-side in a ‘harmonica’ interface.
The concept behind ‘Restrictions’ is that you can limit Preflight checks to only the elements of the file you actually want to check. This means that the Preflight is much more specific and you only get warnings and errors on objects that you care about. This makes the check more relevant and more accurate.
Restrictions use Action List technology and are based on ‘Select Actions’. You can use some of the supplied Restrictions or very easily make your own depending on what you want to check.
In the example shown, the Restriction limits the preflight check to objects that are within or overlapping the PDF Bleed Box.
You can also see the options to import, export, create, delete and edit Restricting Action Lists directly in the Restrictions interface.
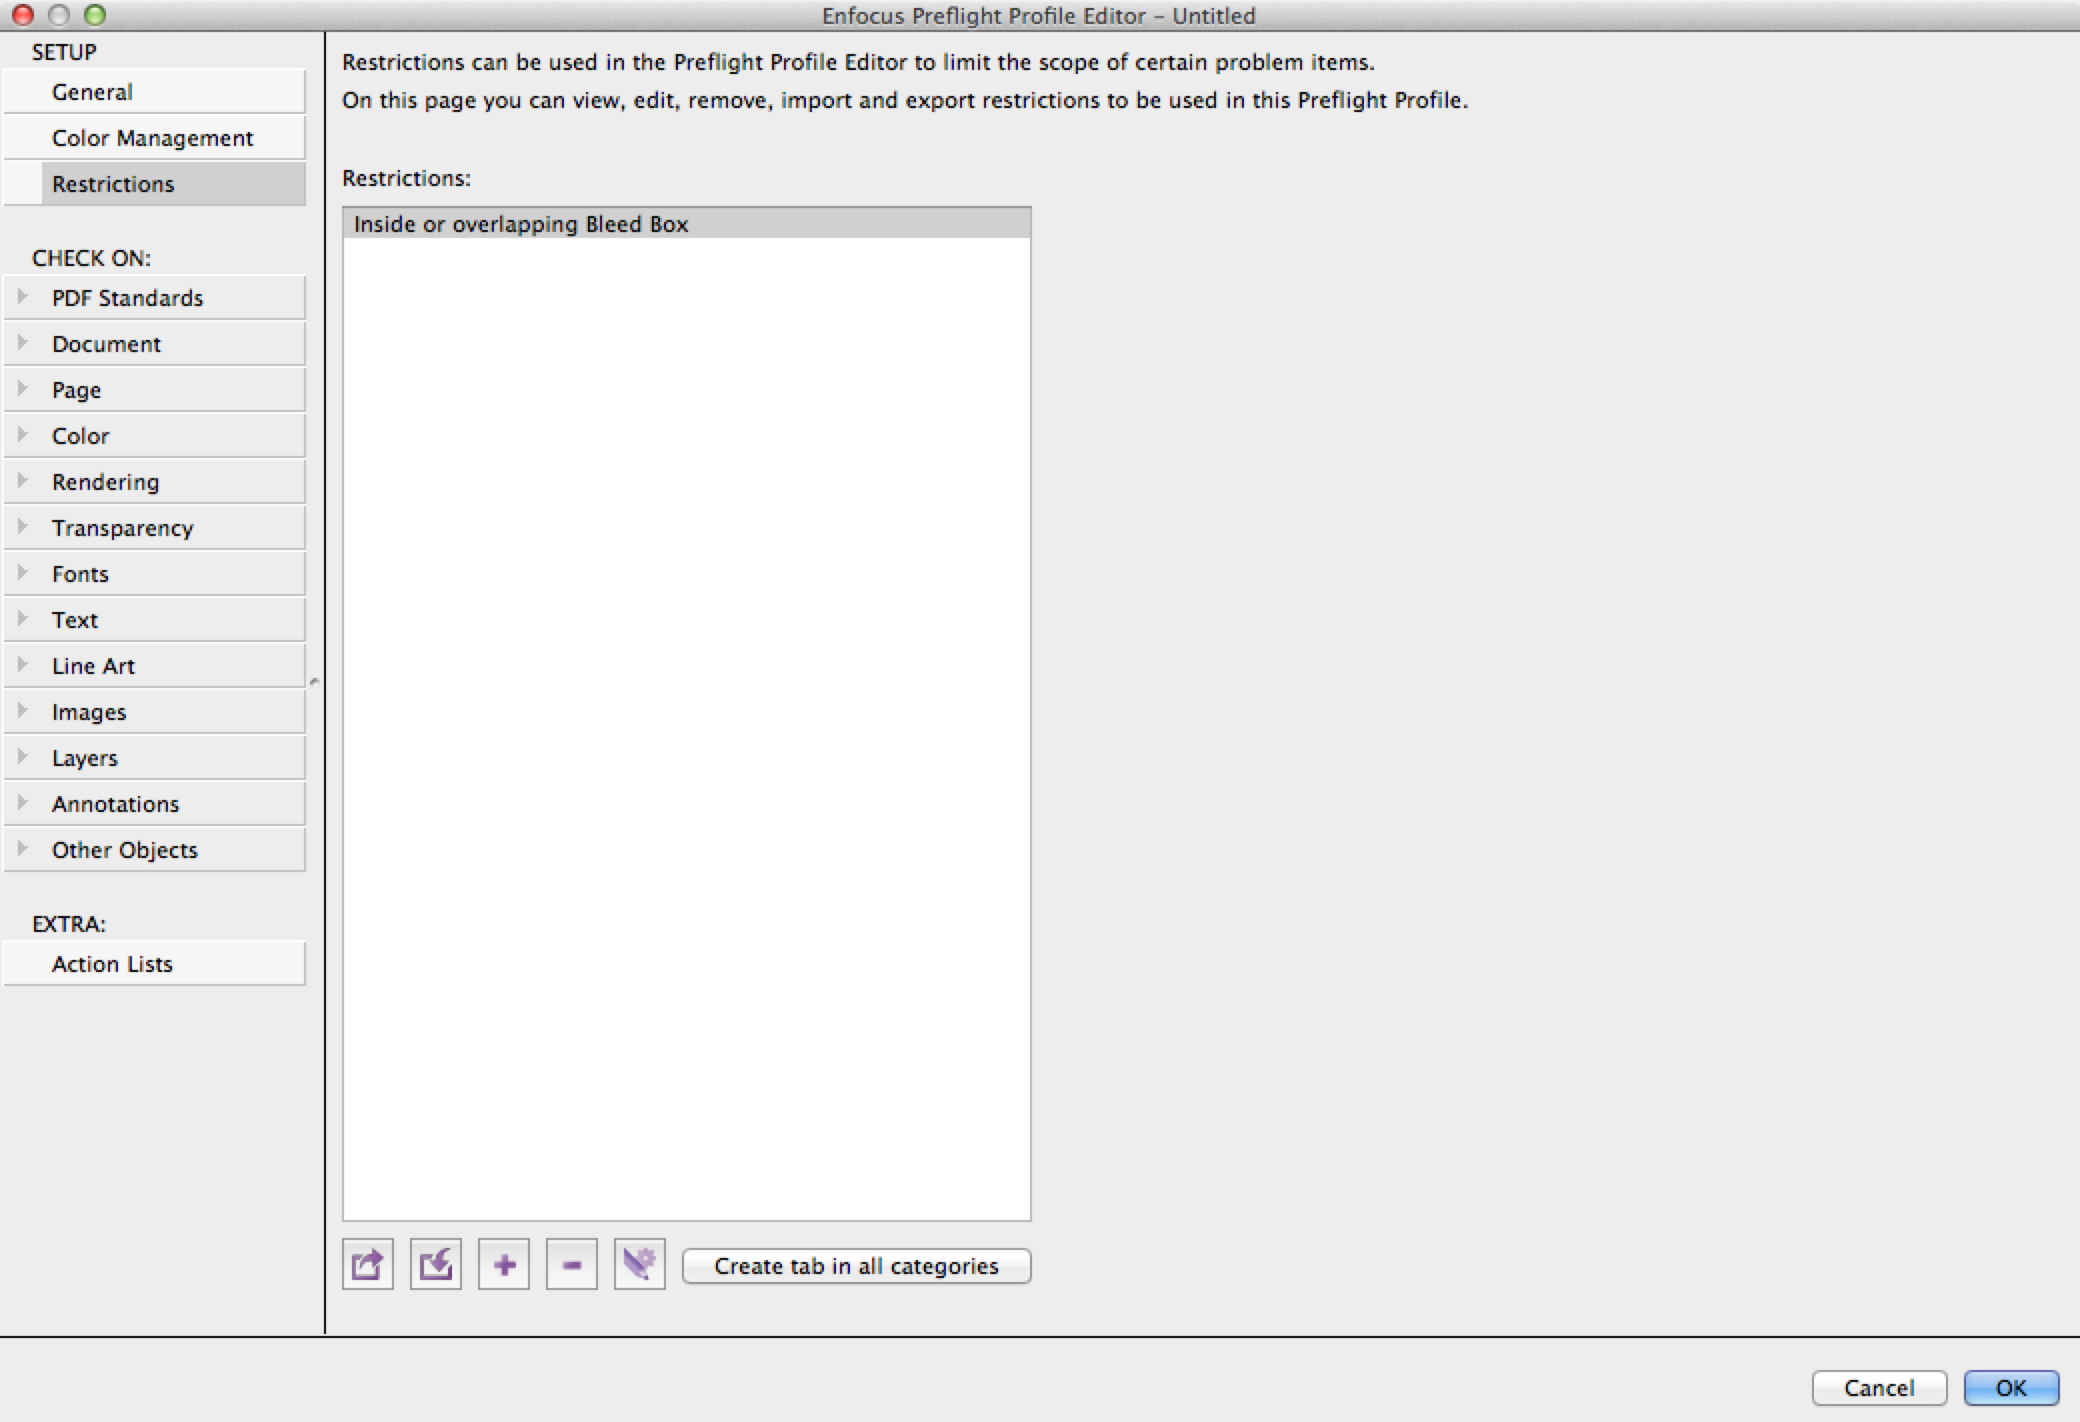
For illustration you can also see the construction of the Restricting Action List. In this case it is just one Action that is used to define the Preflight Restriction to within the PDF Bleed Box.
Restrictions can be anything that you can find in the Select Actions so they could be an area of a PDF, a Page Box or layer(s) within a PDF.
Please note that some Preflight checks do not currently support Restrictions such as the Page based Total Area Coverage check.
To enable a Restriction simply create a new Preflight Profile or edit an existing one exactly as you did with a previous version of Pitstop.
When you turn on a Category to add Preflight checks you will see a new option at the top of the editor ‘Restrict to:’ with a default setting of ‘Not restricted’. You have an option of ‘Import Restriction’ which allows you to add any Restrictions directly from the Action List database.
If you added Restrictions to the panel shown above within the Preflight Profile editor then these Restrictions are automatically made available in the dropdown menu, you don’t have to re-import them.
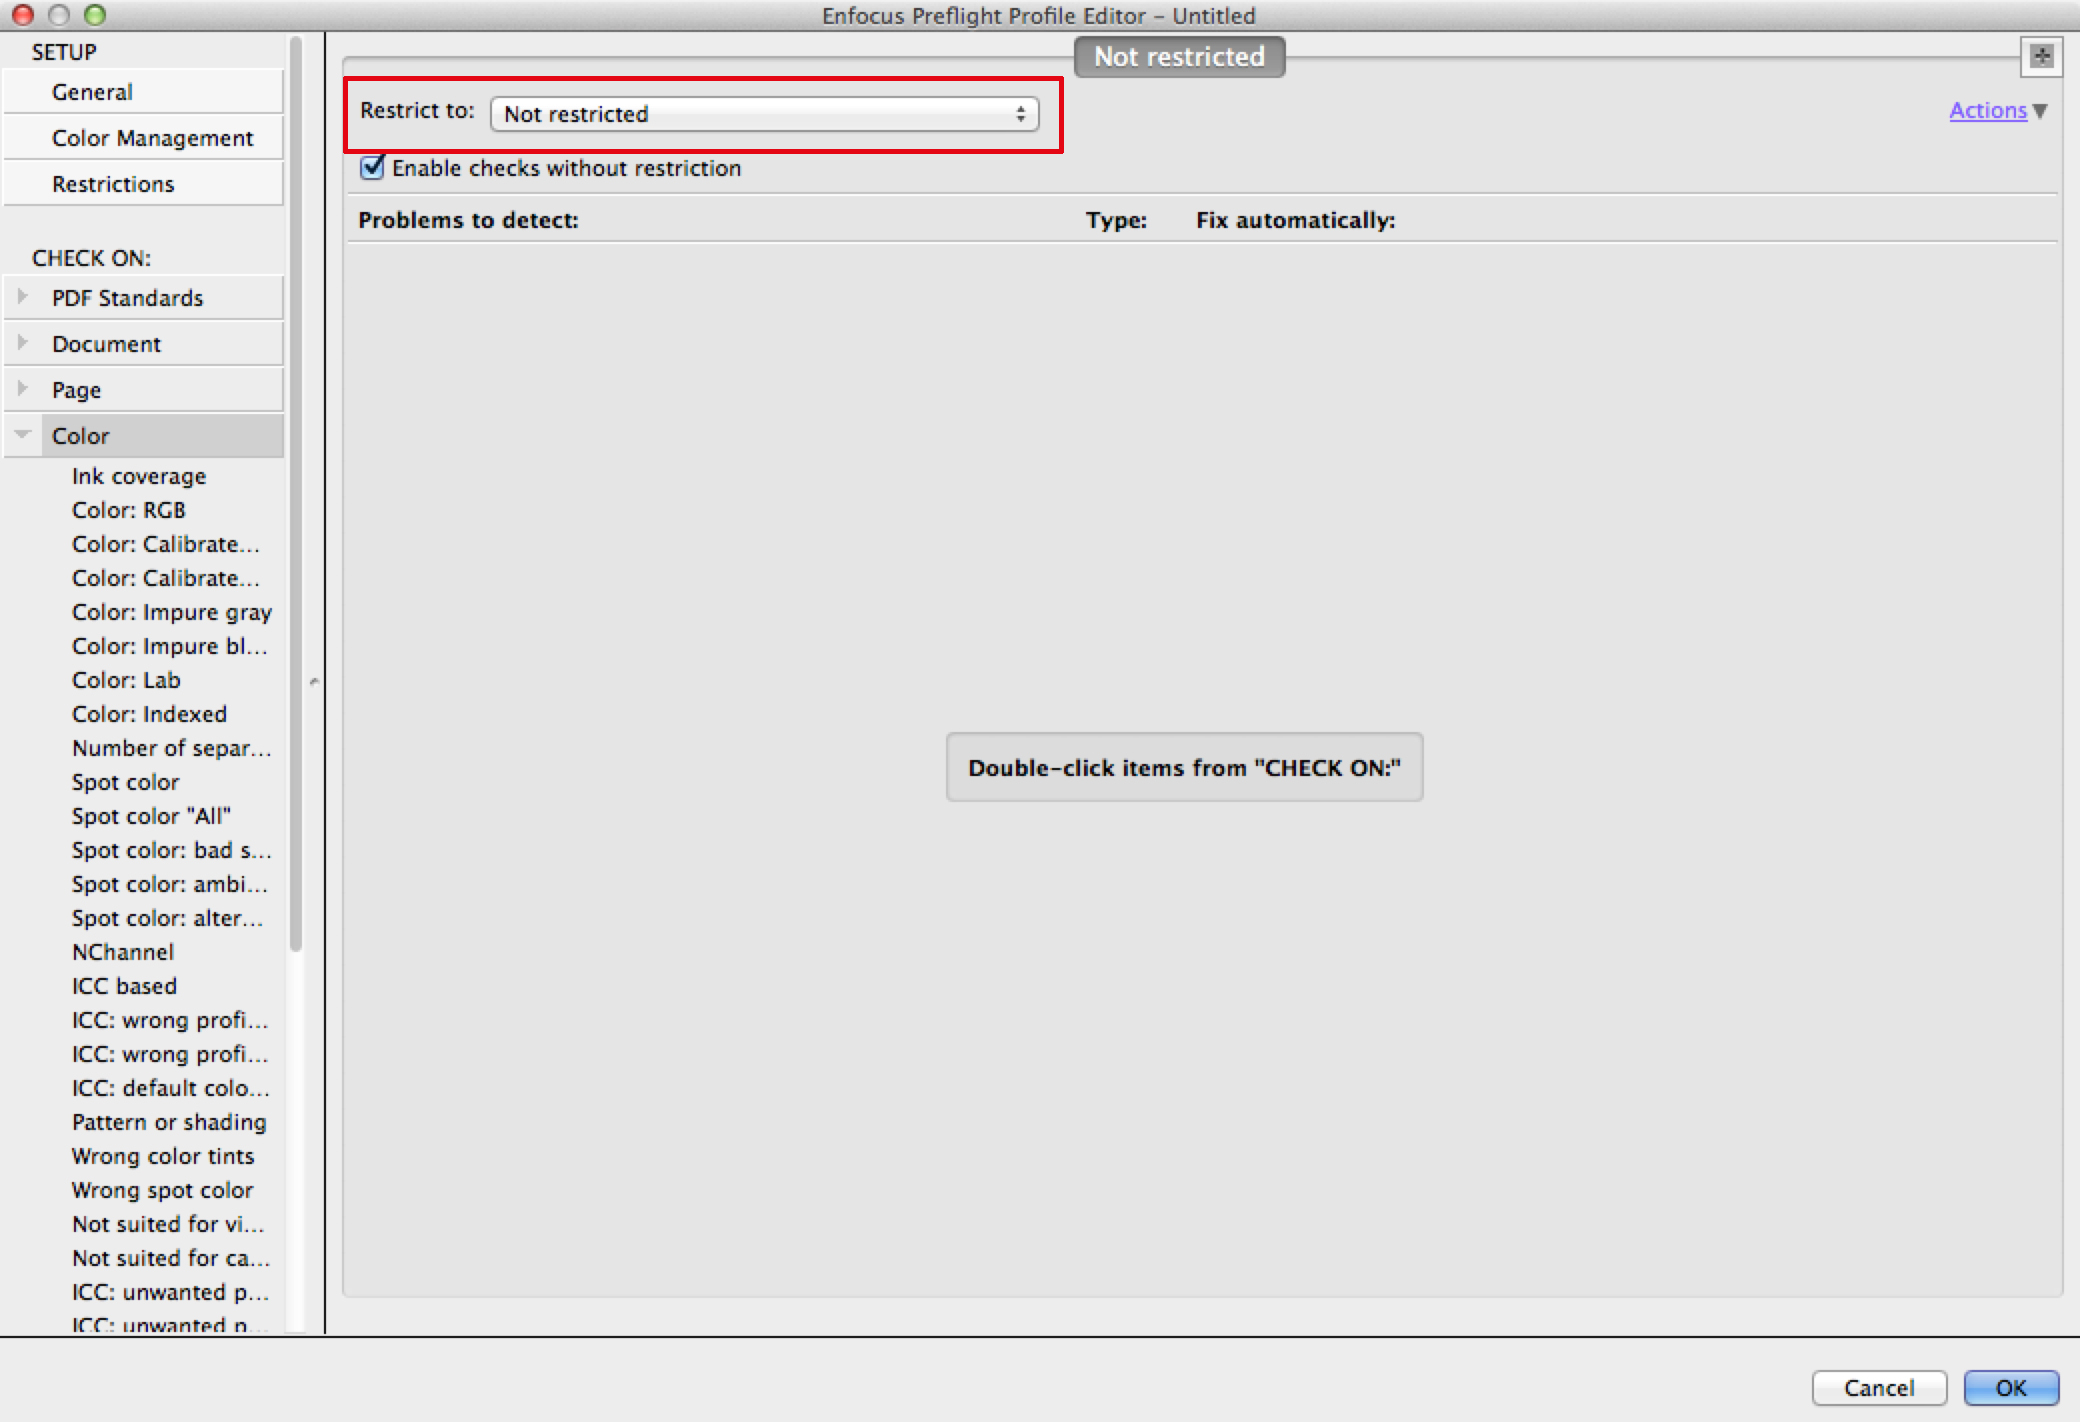
Once you have selected or imported a Restriction, any preflight checks or fixes you add to the Preflight Profile under that Restriction will be bound by that Restriction. In the example below you can see that the page size check for A3 is restricted to only be performed on the first page of the document. You can also add more Restrictions to your Preflight Profile if you wish.
To add another Restriction to your Preflight Profile, simply press the + button highlighted below. This creates a second tab where you can define another different Restriction and add your required Preflight checks if required.
You can see on this second tab the Restriction is to check all pages except the First page and we are now checking for A4 Portrait. The first tab was restricted to the First page only and was checking for A3 Landscape pages.
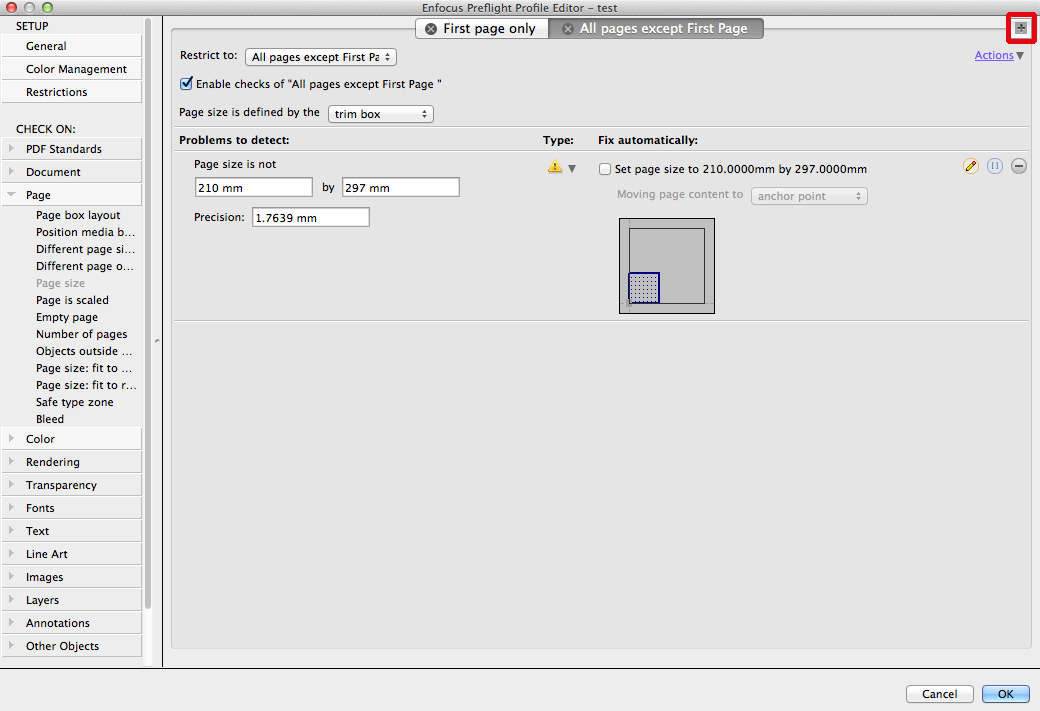
This is the essence of how Restrictions work; each tab can restrict the checks to different elements in the PDF file and check them in different ways. You can add as many tabs as you need.
One other point to make about Restrictions is that they can also be used to group Preflight checks together. In PitStop Server these can also be driven by XML job tickets and Switch variables and turned on/off using Smart Preflight. Smart Preflight can be enabled via the ‘Actions’ drop down menu and configured here.
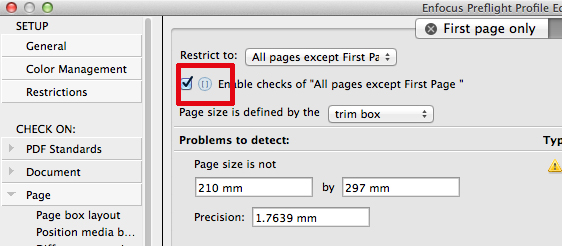
When a Preflight Profile with Restrictions is used and a Preflight report generated, the name of the Restriction is included in the Navigator/Preflight report so you can clearly see which Restriction the particular warning/error is related to.
PitStop Server CLI
With the installation of PitStop Server the command line version of PitStop Server is also installed. In PitStop 13 we have added some functionality that is only available through the CLI version and the PitStop Server PDF2Image configurator, not in the standard hotfolder based PitStop Server.
PDF2Image conversion
The new functionality that has been added is the ability to convert a PDF file to an image. There are various options available. PNG and JPEG formats are supported in a variety of color spaces; output can be Composite or Separated. For a full list of available features please see the notes on the PDF2Image Configurator for Switch that is documented below.
PDF2Image Configurator (Requires Enfocus Switch)
The PDF2Image Configurator is available in Switch 12 if the Configurator module is present. In PitStop2Switch it is currently not supported and will not be available until the release of Switch 13.
Key functionality of the PDF2Image and Configurator is described below.
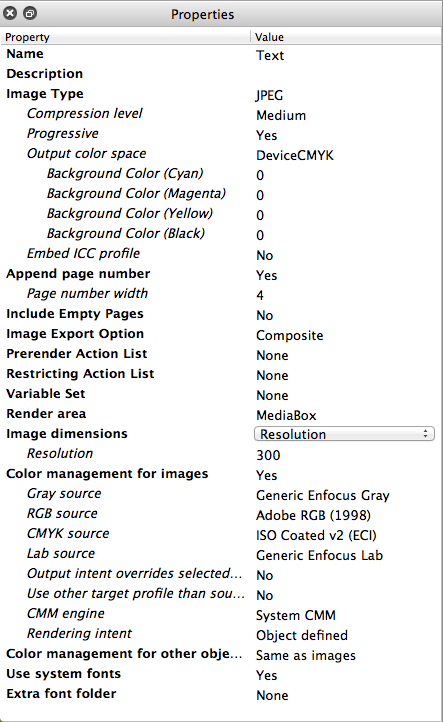
Image formats
PDF2Image supports JPEG and PNG image output.
Output Colorspace
DeviceCMYK, DeviceRGB and DeviceGray are supported depending on the image format.
Leading zeros in numbers
Page numbering supports leading zeros, the width of the numbers is user definable.
Empty pages
The user can define if completely empty pages are rendered to an image or not.
Export Options
Composite and separated output are both supported.
Append Separation Name
For separated output the color names can be added as a suffix to the file name.
Prerender Action List
An Action List can be applied to the PDF file before it is rendered to an Image
Restricting Action List
An Action List can be used to select the parts or objects in the PDF that are to be rendered to an image. These are similar to the ones used as Restrictions in Preflight Profiles.
Render Area
The area of the PDF that is to be rendered can be set to one of the PDF page boxes.
Image dimensions
These can be set by resolution and by height an/or width in pixels.
The configurator also contains color management and font folder options.
Log Selection
Log Selection is an existing Action, but has been improved in PitStop 13.
This Action allows a message to be generated if something was ‘selected’ or found in a PDF file, it works in conjunction with a ‘Select’ Action and also allows a user defined message to be used.
The change in PitStop 13 is that the Action can now generate a message if something is NOT found in the PDF file, so you can now use it to check if required elements are present.
New Actions/Action Lists in PitStop 13
New Action - Add Bleed
New Action - Select page by gray surface
This is a very specific Action designed to select pages that have a small amount of color but should be treated and printed as Gray. This Action works on the % of color based on area and uses Chroma to define if an object is colored or not. Objects with a visual appearance of Black or Gray are treated as Gray. As this Action can be affected by the color management preferences a tolerance has been included.
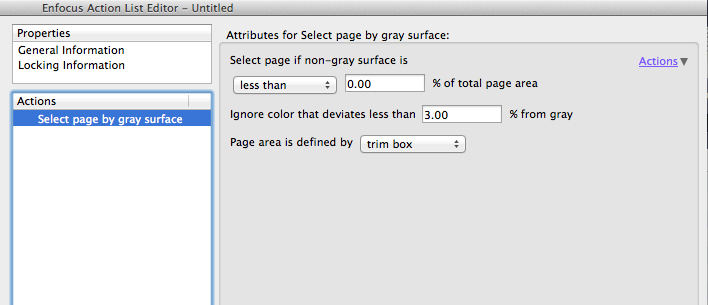
The use case for the customer who requested this feature is that they want to be able to select such pages and convert them to Gray for printing.
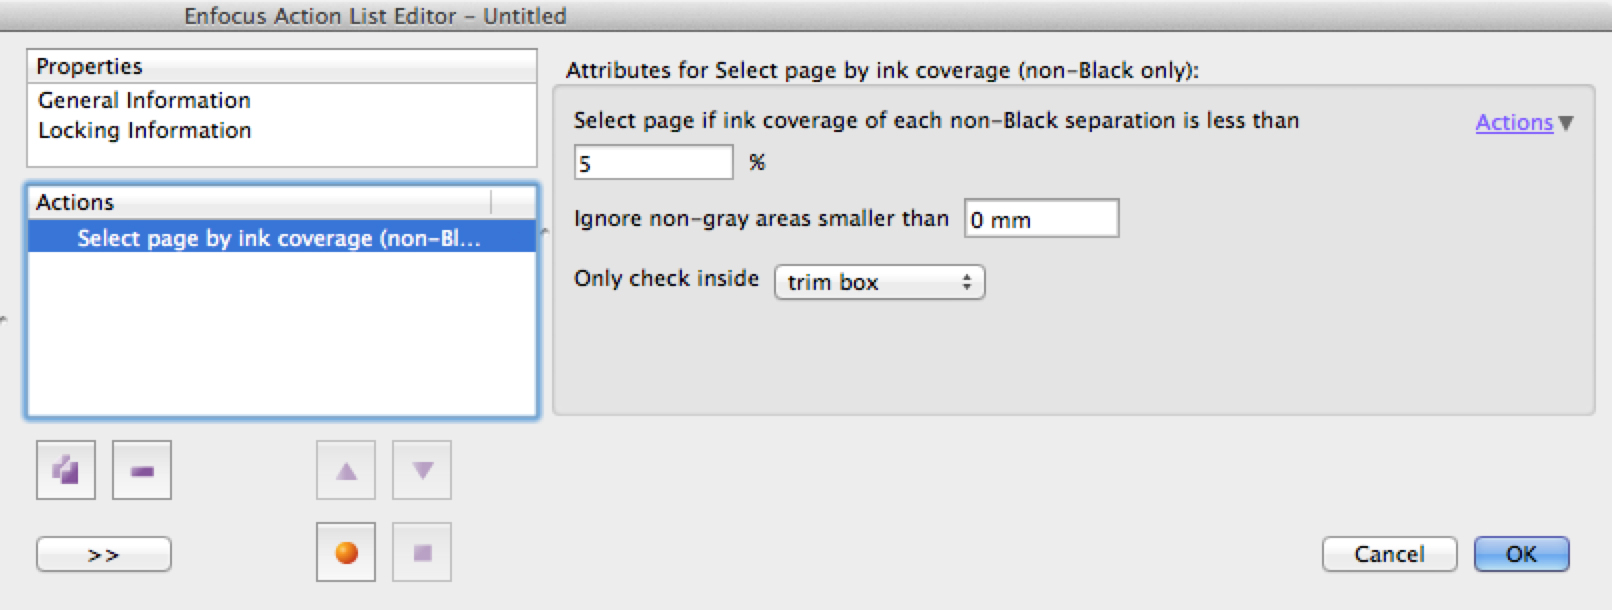
Select page by ink coverage (non-Black only)
This new Select Action also selects Pages that have a small amount of color so they can be converted to Gray. In this case though the selection is based on the non-black Ink Coverage. The Selection can be fine-tuned based on area and also limited to within a Page Box if required.
New Standard Action Lists
- Generate Bleed to 3mm if some, none, or not enough
- Generate Bleed to 3mm if none, and correctly set all Page Boxes
- Check for live type (text maybe outlined)
- Check if all pages have Crop Marks or not
Restricting Action Lists as examples of Preflight Restrictions
- All even numbered pages
- All odd numbered pages
- Ignore Cover page
- All pages except First and Second pages
- All pages except First and Last pages
- All pages except First page
- All pages except Last page
- First and Second pages only
- First page only
- Last page only
- Inside or overlapping Bleed Box
- Inside or overlapping Trim Box
- Landscape pages only (based on Trim Box)
- Portrait pages only (based on Trim Box)
- Only Text
- Only Images (Raster)
- Only Line Art (Graphics)
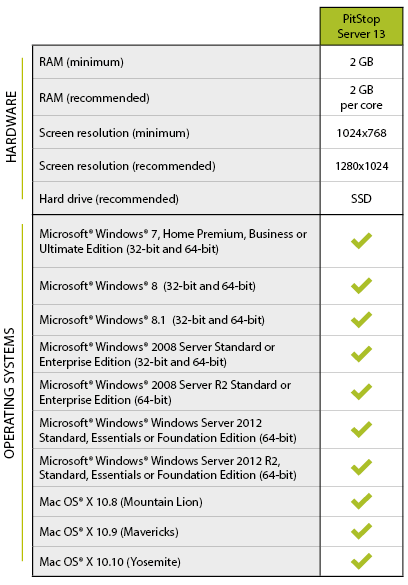
System requirements
Bug fixes covered in this release
|
Log Number |
Description |
|
32304 |
PitStop Server lib processor crash when using unsharp mask on images that use a "predictor" to improve compression |
|
32476 |
Hotfolder issue with SMB Share on Linux? |
|
32615 |
Action List only works on page one or if run on current page one at a time |
|
32983 |
PDF keywords are sometimes incorrectly handled |


