Various flow elements allow associating email information with a job as it moves along a flow. Usually this email information must be specified as the value of a property called "Email info" or "Email info map". This section discusses the corresponding property editors (i.e. the dialogs shown for these properties).
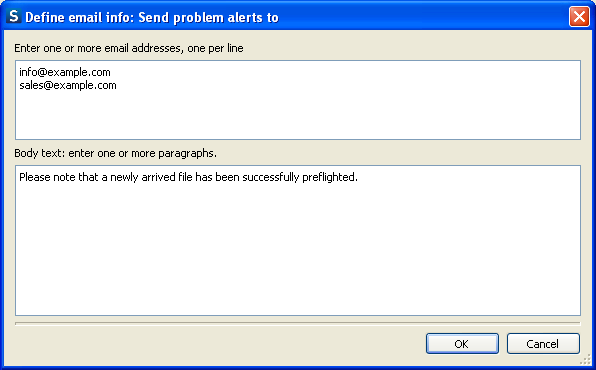
Here is the property editor for Define email info: Send problem alerts to:

This editor allows entering a single set of email info consisting of a list of email addresses and a segment of body text. It is used, for example, to send alert messages to users.
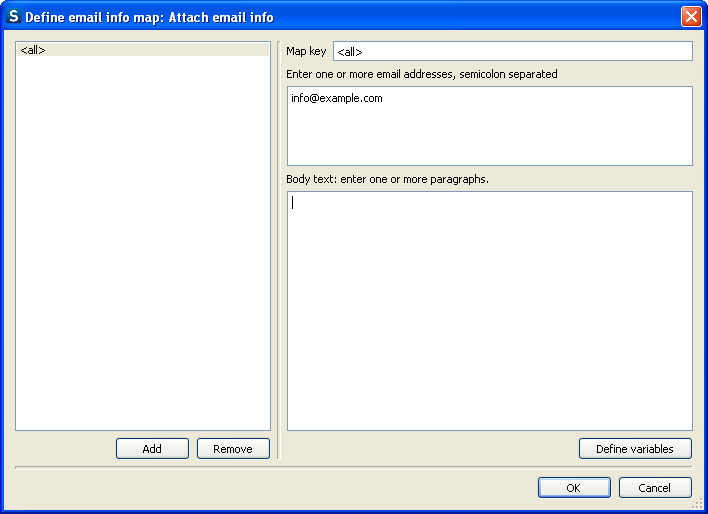
And here is the property editor for Define email info map: Attach email info:

This editor allows entering a mapping table with multiple entries: each entry maps a specified "key" to a complete set of email information (and the order of the table entries is insignificant). It is used by flow elements that may receive jobs from several sources, such as mail receive and FTP receive. The intention is to allow specifying a different set of email information depending on the origin of the job.
For example, let's say that we've setup an FTP site where our customers submit jobs.
We have provided a separate subfolder for each of our customers (with the appropriate access rights). Using a single FTP receive instance in Switch, we can associate the appropriate customer's email address with each submitted job by mapping the customer's subfolder name (the "key") to the email address for the customer (the email information contained in the table entry for that key).
FTP receive always uses subfolder names as the key; other tools (such as mail receive) allow selecting the basis for the key. This is described in more detail in the following section.
In tools it is possible to have multiple key matches for the same job. For example, if a job is submitted in a nested subfolder some levels deep, FTP receive uses each of the subfolder names in the nested subfolder path as a key in the mapping table. The email information for all matches is combined and associated with the job.
If the mapping table contains an entry for the special key <all> with non-empty email information, this is added for all jobs regardless of their key.
Follow these steps to add one or more Email addresses using the Define email info map: Attach email info dialog box:
- Click the Add button in the Define email info map: Attach email info dialog box to enable the textfields in the right pane.
- Type one or more Email addresses separated by a semicolon in the first textfield.
- You can type a standard text for the message in the second textfield.
- You can also click the Define variables button to invoke the Define text with variables dialog box and insert predefined variables for the Email addresses and message. Click OK button to save settings and close the Define email info map: Attach email info dialog box.