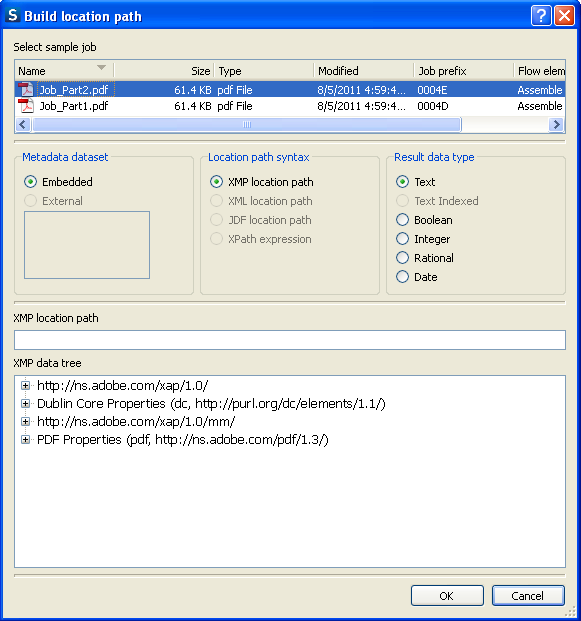
The "Build location path" dialog offers assistance with building location paths for the variables in the Metadata group using picked up metadata by a sample job. The dialog supports the various data models known in Switch.
See also XMP location path syntax.
Showing the dialog
The property editors Defining text with variables and Defining a condition with variables show a button called Build location path when a variable in the Metadata group is selected and at least one valid sample job is available (See Working with sample jobs).
When you click this button, the Build location path dialog is displayed. When you click the OK button after some modifications, the selected Metadata variable is updated accordingly.

Metadata dataset
This section lists the various datasets associated with the job. You can select the embedded dataset (which is always available, even if it is empty) or one of the external datasets associated with the job (if any).
Location path syntax
The data model for the selected dataset determines the available options for the location path syntax. Unavailable options are automatically disabled in the user interface.
The selected location path syntax determines the layout and behavior of the dialog's bottom portion, as described in the following sections.
Result data type
The result of the location path configured in the dialog's bottom portion (evaluated in the context of the sample document) determines which Result data type options are available. Unavailable options are automatically disabled in the user interface.
The selected Result data type determines which of the variables in the Metadata group is used to produce the result.
Location path
For the choices "XMP/XML/JDF location path" the bottom part of the dialog displays the following two items:
An editable text field labeled "xxx location path".
A tree view representing the metadata in the sample document, labeled "xxx data tree".
You can expand and collapse the nodes in the tree view, but the tree is not otherwise editable.
When you select a node in the tree view, the dialog displays the corresponding location path in the editable text field (discarding anything that was already there).
Vice versa, when you modify the contents of the editable text field, and the contents represents a valid location path pointing to an existing node, the dialog selects that node in the tree (and expands and scrolls the view to make it visible if needed).
The OK button is enabled only if the location path is valid and the selected node is compatible with the selected result data type; otherwise an appropriate alert message is shown at the bottom of the dialog.
XPath expression
For the choice "XPath expression" the bottom part of the dialog displays the following items:
An editable text field labeled "XPath expression".
A read-only text field that displays the result type and value of the expression as it is evaluated against the metadata, for example: "Integer: 5", "Boolean: false" or "Node set: 3 element nodes"
A control bar with buttons and checkboxes (see below).
A read-only multi-line text field that displays the XML for the sample metadata and highlights the nodes in the result node set, if any.
When you modify the contents of the editable text field, and the contents represents a valid XPath expression, the text fields are automatically updated to reflect the expression's result.
The control bar offers buttons to navigate between the nodes in a result node set, and two checkboxes that affect the XML display:
Auto-indent: when turned on, the XML is "pretty-printed" with nested indentation.
Color-code: when turned on, each XML node type is displayed in a different color.
The OK button is enabled only if the XPath expression is valid and its data type is compatible with the selected result data type; otherwise an appropriate alert message is shown at the bottom of the dialog.